Friday 16 December 2016

Blogmas day 16 - Top 5 Favourite Christmas Scents


Helloooo!! I'm shamelessly ignoring the fact that a few days have gone past since my last post....

Today's Blogmas post is all about my fave Christmas Scents.

There are so many scents that scream Christmas to me - these also include scents that some "smart" person has just stuck the word Christmas in front to make a few ££s. I love the sweet scents and also the spicy ones.
There's also some scents that don't really fit into a category of their own.

My top 5  faves, In no particular order are;

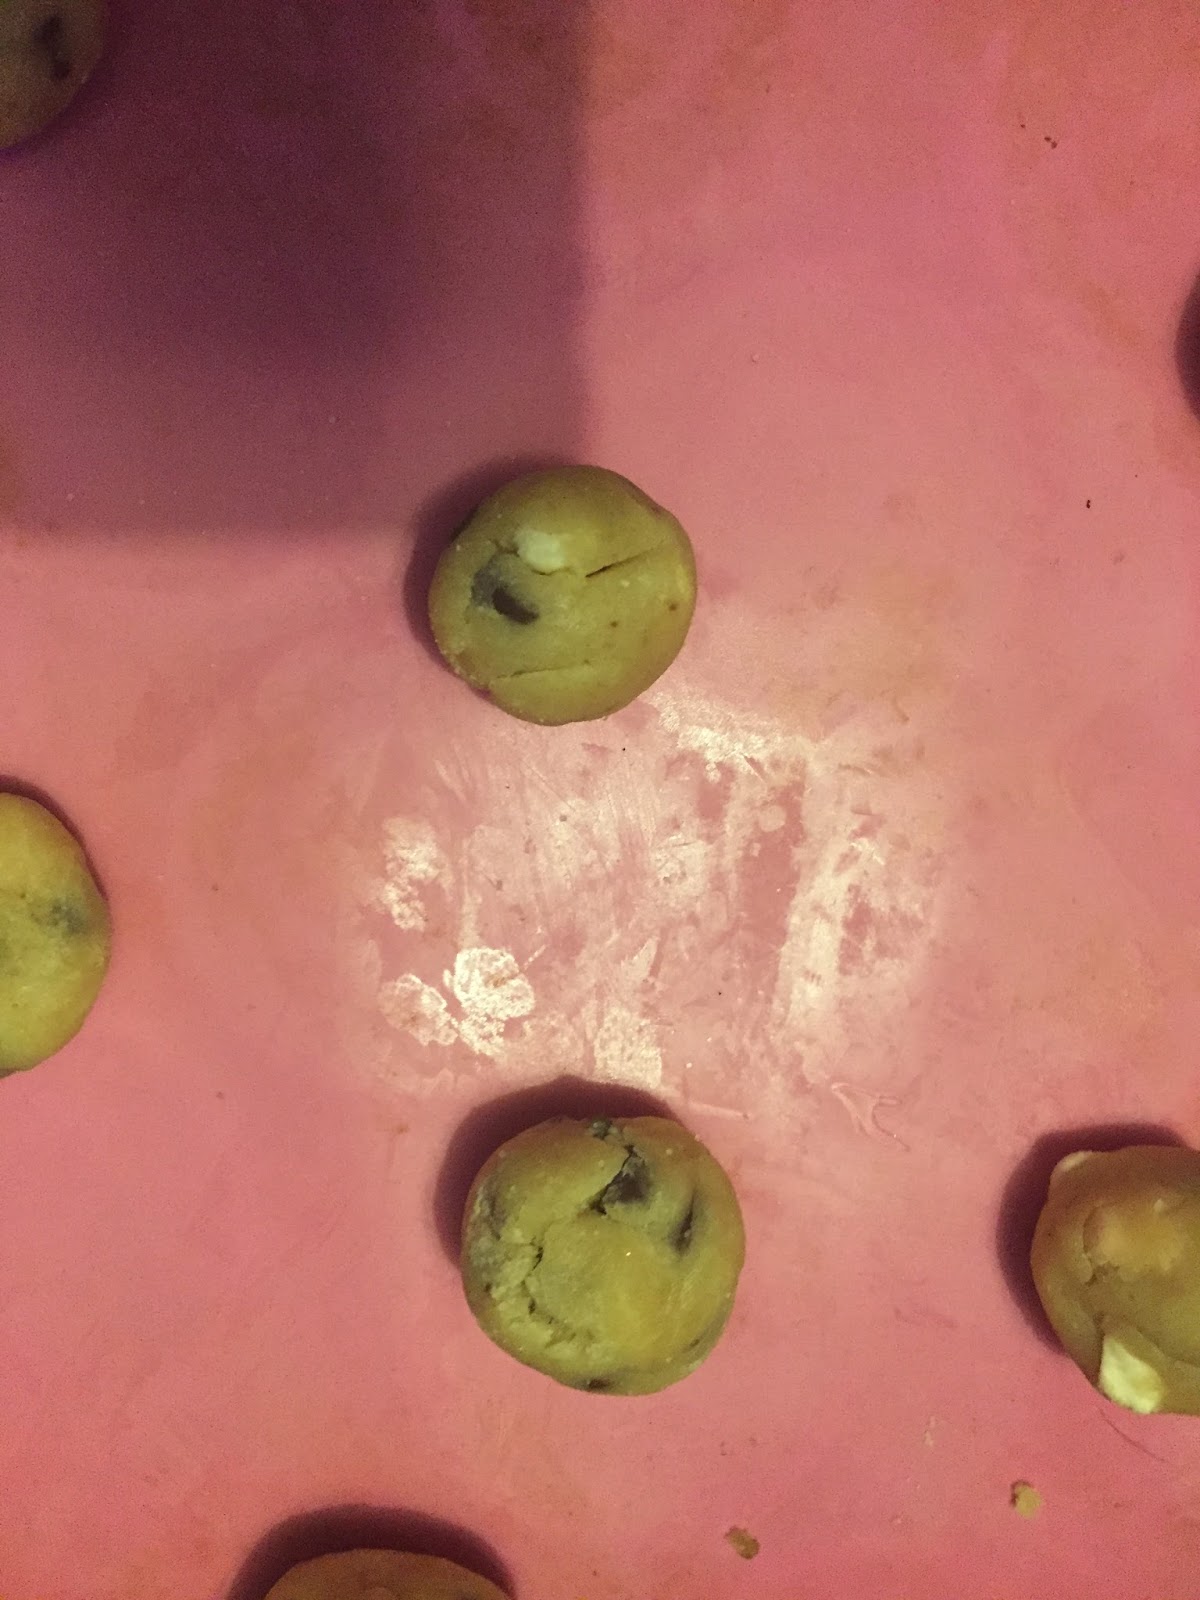
Christmas Cookies (see what I mean lol) - I am drawn to the candles that have this scent, different brands have different names like Cookies for santa etc. The scent is sweet but spicy with a buttery undertone but with enough spice to cut through and keeps it from being sickly. Strong vanilla can give me migraines so I stay away from the candles, fragrances etc that add too much.

Mulled Spice - Something about mulled fruits just brings a Christmasey feeling and whether it's from a candle, drink or even a diy stove top room scent, I can't get enough of it.

Pine - Pine cones, Pine needles... just pine!! Such a crisp and earthy scent. It doesn't get more Christmastime than this rich memory inducing fragrance.

Orange and Clove - There's something about this combination that soothes my mind. It's warming but also refreshing. It's another stove top diy scent that I love to make. I will be trying to make sliced orange and clove pot pourri this year and maybe the whole oranges with cloves baked inside as decor.


Frankincense, Lavender and Rosemary - I know this an odd combination but Frankincense is definitely up there with the quintessential Christmas scent, (It's also one of my fave essential oils.) The Lavender adds a lovely floral zing and the rosemary pushes an earthy fragrance which cuts through the sweetness. I love to add this to oil burners and my humidifier.


I have to be honest and say that I love these scents so much that I actually enjoy them all year round. With the Christmas Cookie and Pine ones, I try and stock up with candles in theses scents at Christmas time so I can burn them during the year when they aren't largely available.


Which Christmas scents do you love? Or even don't like at all?
Catch up tomorrow xxx

Monday 12 December 2016

Tourists in London


Hi everyone!! My laptop is still "dead" and I'm not sure if I can get it fixed or salvage all the footage on there so I haven't uploaded for a long time.

I managed to upload a little video of our fun being "Tourists" in London.


Hope you enjoy xxx

Blogmas!! {A little late!!} - Christmas Colours


No excuses!! I have dropped off yet again with my blogging,,, and many social media activities if I'm honest. I have been very busy lately! I think social media is just that,,,,social and I find if I have plenty of real life, day to day things I have no time for social time which includes socila media too.


All that being said, earlier in the year, I was hoping to participate in Blogmas this year but here we are at 12 December and not one Blogmas post yet!! I was gonna just call it a day and not bother as it's been so many days but why throw away all the days I can do from here on out for the days I have missed?

So I will do a Blogmas post today and keep it going (if I can).

Today's Blomas post will be about Christmas Colours.

I don't know where it came from but there are definite colours or a colour scheme that are though as Christmas Colours like; Gold, Red and Green or Silver, White and Blue etc.

The combination I used for our tree last year was Silver, White and Blue. I tried to get pink baubles but the only ones I saw were far too expensive.

I like using Gold but I do find it can be too much if used a lot. No offence but it just looks ..... is gaudy a bad word?? hmmm let's just stick with too much lol.

Of course I love to use pink for every decor scheme so match it with white and silver to give a Christmas feel
I plan to do some decor pieces in this colour scheme for my room.

I will be putting up some decoration bits up around the home but will have to put them out of our kitten's reach. I like to put bits on the landing window sills but they have become his favourite place to cotch so will probably have to rethink. I'm still deciding whether or not to stick to one colour scheme for every room or have different colour schemes..... I'll let you know what I decide.

Ok, short and sweet post today. What are your fave Christmas Colours? Which colour scheme do you like to use? *see* you tomorrow xxx


Tuesday 29 November 2016

Fun With Baking {Betty Crocker} - Our Package and trying the Cookie Mix


I was very happy to receive our package for the Betty Crocker Fun With Baking campaign.

The boys too were very excited and couldn't wait to get baking. Half Term was coming up the next week and the package came at just the right time.
Although I bake from scratch, I used to have so much fun using packet/box mixes and I knew that the boys would find it really fun to make goodies using a mix. It would also be quick and simple.

The package arrived and my youngest was so happy, dancing and whooping. The other two in age were also happy and the three of them unpacked the box with great interest (the older two were busy doing other stuff - teenagers lol)


The box contained:
• 1x Vanilla Icing
• 1x Velvety Vanilla Cake Mix
• 1x Chocolate Chip Cookies Pouch
• 1x Chocolate Fudge Brownies
• 5x Betty Crocker ‘Baking with Kids’ Recipe Cards
• 1x Campaign Guide (12-page)

For us to use and:

• 20x Activity Flyers
(to entertain the kids during the half-term holiday)
• 20x vouchers for £1 off all Betty Crocker products

For me to give away.

The boys decided that they want to bake the cookies first.

I thought I'd add some mini marshmallows and we got baking.


I followed the instructions and placed all the ingredients into our mixing bowl. I let the boys take it in turns to mix.


Next came the forming of the cookies - I chose the ball method and we flattened them slightly with the back of a fork.


I put them in the oven for slightly less than the suggested time as I wanted them to be soft and goey.

The results were indeed soft and goey and quite delicious if we say so ourselves ;)


The boys were very proud of their efforts and enjoyed tasting them, as did the two teenagers who unsurprisingly were no longer too busy - hmmmm


All in all it was a great baking time and the Brownies have been voted to be the next try out. I'll be sure to post when we bake them.


*** Please note that we were fortunate to receive the Betty Crocker package as part of a campaign. As always, my thoughts and opinions are honest and genuine (Not sure what protocol is but thought I'd add this in to keep all in the know xxx)

#FunToMakeUK  #TheInsidersUK

Thursday 6 October 2016

Pescatarian Challenge


Hi there, I hope you are all well.

As you may know, I started a healthy lifestyle journey a little while after my healthy hair journey and have been doing quite well, I always look to push myself a bit harder and as I have mentioned a few (ok many) times, I love challenges to motivate and inspire me along my way.
For a long while I have been wanting to include more fish into my diet and I went through a time of only eating fish during the day and no meat.
I felt like I wanted to up it and remove all meats and poultry for 30 days so Pescatarian it was.

This was in July and I started my challenge in August. It was much easier than I thought and I got through August feeling great. I had a couple gatherings to attend including a BBQ (arggghhhh lol) but got by without too much longing for the yummy meat dishes.

The most difficult part of my challenge wasn't actually eliminating the meat/poultry or the cravings, it was purchasing ready made foods that were suitable for pescatarians and with no dairy added. I often just chose Vegetarian items but I noticed that these were often laden with cheese, milk and/or cream. I have often had to look for vegan foods to be "safe".

During August, my husband watched with interest as I did the challenge and the boys were very happy to taste my dishes. As August drew to a close, I thought about doing another 30 days and a friend who was going to join me at the start said she really wanted to try so I told her I'd go another month to keep her company The Hubster often spoke about how nice my meals looked and decided he wanted to try it also.
Now that was a big thing!! Hubby enjoys meat and loves chicken..... and that's an underestimation lol.
While I was happy for him to join me, I knew it would mean more work as I could just make do with whatever I had but for him I would have to prepare meals properly, that would mean two different meals and maybe three if his would contain dairy. I can have my meals with out fish at all, but I knew he wouldn't want that.

The second month for me was even easier and I have to admit I didn't miss meat and didn't crave chicken on a day to day basis. I missed certain dishes but I was fine. Hubby on the other hand found it very difficult bless him.

I tried to be creative with the meals but he really missed meat and chicken... A .... LOT!! He said I made it look easy LMBO!!! He found having me prepare his meals at home and sometimes his lunch was great but he found it hard to purchase food while out.

I am proud of his efforts and he did last the month.. hoorrahhhh!!! Now that he is able to eat meat and poultry, he has found that he chooses not to most days and that chicken tasted different to him.

I on the other hand have chosen to go another 30 days/month. I actually cannot believe I have gone 67 days being Pescatarian!!

I realise that I haven't posted about this whole thing on here till now...(oversight and busyness) But I plan on doing many more posts on my Pescatarian challenge with meals etc.

I would love to hear from any of you who have chosen to be Pescatarian or even Vegetarian (ooohh or Vegan) and your thoughts. Also if you have any meal ideas.

Monday 26 September 2016

Review - Cool Breeze Aroma Diffuser


Hiya! I hope you had a great weekend.
I am still battling my allergies and now I have a 'detoxification' type thing going on from Oil Pulling which I started a couple of weeks ago (I'll be doing a post about it soon).

I have been using a few things to try and combat my symptoms, I received a Diffuser/humidifier to review last month and it came at the right time as my Hubby and eldest two were also suffereing from summer allergies and we all also had colds that made us feel horrible.

The Cool Breeze Aroma Diffuser is so cute. It has a dinosaur egg design that I find adorable, I love cutesy things so this is right up my street.

The lights change colour and you can leave it to run through the colour sequence or you can set it to stay on your desired colour. The way the lights are set out make them light up the room so nicely and reminds me of a light display myself and the kiddies had when younger.
My youngest can literally stare at it for ages when it's on.

The mist can be set to desired intensity.

The unit has a timer and auto shut off.

I put an oil blend to help the allergies and cold symptoms - Rosemary, Olbas, Peppermint and Frankincense. The blend really helped and smelled really nice too. I'd recommend you give this blend a try if like us you are feeling yucky.

A few blends to also try are:
Lemon and Rosemary - to freshen the room
Lavender and Rosemary - to freshen both room and my mood
Rose, Lemon and Frankincense - to uplift and give a lovely scent to room
Lemongrass and Cedarwood - for odour removal in the kitchen.


I am loving the diffuser so far.


I recorded an Unboxing and First Impression video:


**This is NOT a sponsored post, I was sent the Diffuser to review**

Thursday 22 September 2016

Straight Hair - Using Beautiful Textures TMS


Hiya!! I know I promised to come back and do a follow up post to my Straight Hair Temptation post but time ran off as usual and I didn't get a chance.

I did however upload the video with a more in depth - read CHATTY - look at the TMS

You can see the Unboxing and Application here:


Here's the Blowdry, Straighten and the finished results:


I will be uploading a maintenance video soon. Bye for now xxx

Wednesday 21 September 2016

Review: Matcha Organics - Iced Almond Milk Matcha Latte


Hi everyone I hope you are doing well and enjoying the mild weather as we shift into Autumn.

The weather here is still warm for the most part and I have been enjoying iced beverages. I have been wanting to try Matcha Powder for ages but didn't get round to buying any so when I was asked to review some I jumped at the chance lol. I decided to try an Iced Latte and since I'm still having  dairy intolerance/allergy issues, I made it with some Almond Milk.

I have to admit, when the powder arrived, I was surprised at the size as I had seen big tubs in costco(well it's Costco after all lol) and this was a smallish pouch. I watched the video on their site and the lady explained how potent it was ans also gave some tips on how she liked to use it.

When I made a cup of Matcha Tea, I was actually shocked at the strength!! Potent is the word allright!

With this in mind, I decided to use less powder for my latte.

Ingredients:
Almond Milk - I used Alpro unroasted, unsweetened
Matcha Powder.
Agave.
Dairy Free Creamer - I used Walden Farms Calorie Free
Ice - lot's of it.


Recipe:
Pour some boiling water into a cup, add some Matcha and stir well.
Pour some Almond Milk in (I used it cold so it would cool down the Matcha so my glass didn't shatter when it had the ice in),
Stir, add a little non dairy creamer, stir again,
Place lots of ice into your glass (I used a bottle)  - about three quarters full - and poured the latte on top of the ice (if you are making your own iced beverage, please check temperature of latte as your glass may shatter/break it it's too hot when you pour onto the ice - a lesson I learned a while ago when making iced coffee).
I put a straw into my iced latte ( I love the paper ones) and gave it a stir as it can become watery on top - if you're not using a straw (why not? iced latte tastes so much better with a straw lol) then give it a stir.

 - Enjoy ;)


 **Please note this is NOT a sponsored post, I was sent the Matcha Powder to review, it is available    to buy Here: https://www.amazon.co.uk/dp/B00OJMI0CK
Download your Top 100 Matcha Recipes Here: www.matchaorganics.com/ebook

Saturday 27 August 2016

90 Day Hair Growth Challenge round 2 - Starting Date

Hi Everyone, I hope you are all well.

Round 2 of our 90 Day Hair Growth Challenge is starting on Monday 29th August.

Here's the video with information about what I plan to be doing during the challenge and my starting length check.


Video's from the first challenge that you may be interested in:

First challenge video information:
https://youtu.be/JzPTh4lS6mo

First challenge final length check and why I stopped taking MSM:
https://youtu.be/CM1k9mU6pUU

First Challenge Playlist:
https://www.youtube.com/playlist?list=PLiYfa_ngzAYtp9NdgVth7y_PerVZflXEx

Tuesday 23 August 2016

The Temptation Was Real - Straight Hair


straight hair up close


What can I say? The temptation to straighten my hair finally got the better of me. Butttt in my defence I have held out for nearly 2 years lol.

I had a Box of Beautiful Textures Naturally Straight Texture Manageability System sitting in my box for 2 years or so. I was too scared to use it after hearing/ watching horror stories of changed hair textures to damage. I have been asked about TMS systems in general and this one in particular and I always gave advice based on the research I had done and offered my box to two people for their daughters.
My poor box however went unclaimed and just sat there looking at me.

I had a wedding to go to of my two wonderful friends and had planned my outfit but was at a loss to the hairstyle, I had a few styles in mind but at the back of my mind an idea to break out the GHD's started to form and as the weeks got closer I was more and more tempted by the thought of straight hair.
I took my BT box out of hiding and Wahhhh!!! The box was squashed and the side had a big splotch mark on it, ugh something inside obviously leaked, I checked and it was the leave in and it felt like it was half gone.... I couldn't give it away now that the box was damaged and product half gone... That made my mind up about the straightening, I decided to try the TMS out as knew it would be a hot day plus I would be singing so humidity would be my enemy. I wanted all the help I could get and TMS is meant to have humidity defence.

Box crushed, open and damaged

I watched thousands (ok not quite but it was a lot) of videos, most were 2 years old as this was when it was released and there was big hype and prominent youtubers and bloggers were given boxes and attended special events etc. There were mixed reviews to be honest and I tried to get follow up posts and videos some did have them.... a couple scarily now had short hair after having to cut theirs due to heat damage (GAHHH) I did notice that these ladies used loads of heat at different times and had different treatments done so I decided to risk it,

I was very happy with the results, my hair was straight and flowy. I used to get straight results anyway but that was with relaxed and then transitioning hair. I wasn't sure how my natural hair would react to heat and as I wear it in it's curly state so much I know it had been "trained" to be curly.
straightened hair

It took quite a long time from start to finish but it was worth it.


Side Swoop (please excuse my expression lol)


The day of the wedding, I had a side swoop fringe/bang and put the rest up in a clippy updo type thing so the front puffed up by the end of the night. I was dancing a lot too at the reception so my edges frizzed up too (I didn't put too much heat on them in the first place though as I wanted to protect them) So I just put the front into two flat twists and clipped the back up again and kept it moving.

Please excuse picture quality, oh and my squinty face


It's now been 11 days since I straightened my hair and although my roots are slightly puffy in places and my edges have won the reversion battle, the length of my hair is still straight and that's where I feel the TMS has done it's part. I have been maintaining my straight hair and I'll do a separate post about that very soon.

I have been loving the quick styling and night time routine/ regime(men) that straight hair has given me and I can see why some choose to be "straight naturals" but I am all to aware of the dreaded heat damage.

I have to wash my hair today because my poor scalp is crying, I'm deliberating whether or not straighten my hair again, or maybe just blow dry it???. I'm curious to see how the system being in my hair will affect my wash and go's and may try it out..... hmmmmm decisions.....
From the instructions and reviews, blowdrying your hair is meant to be so much easier and your hair gets quite straight when using the maintenance products..... hmmmmmmm.

I actually can't decide lol. I'll be sure to let you know what I decided and also discuss how the maintenance products work/feel.

Have you tried this or any other TMS? How did it go? Are you thinking of trying one out?


Thursday 28 July 2016

New 90 Day Hair Growth Challenge!!


Hiiiiii!!! Just a quick heads up that a new 90 Day Hair Growth Challenge on the 1st August!!
Whoooppp!!
I will try to get a video out to chat a little bit about it but I wanted to remind those who wanted another one and inform anyone who would like to join this time around.

I actually cannot wait to get started, I have been protective styling since the last one finished and I'll probably be doing the same for the first week or so of this round.

Let's do this!!!

Wednesday 20 July 2016

Lost Files - Summer 2015

Hiya!! I have been sorting through my recorded files and came across so many little stuff that I had just hiding away. I deleted a lot of them but compiled some into videos.
There are so many reasons why I record and don't upload but I'm trying to get over myself.
Thanks so much for those who have been encouraging me to upload and for always believing in me even when I don't believe enough in myself *mwah*

This compilation is some of the fun things I did last summer (haaa reminded me of the movie - I know what you did last summer..... well now you do... well some of it)


Tuesday 19 July 2016

Just Chatting - No coat.

Hiya!! I haven't got a particular reason or topic that I came along to talk about, but I really felt like blogging lol.
I have got a protective styling update post in the works but that's a longer post and I have a few minutes this time round.

The sun is really out today - it has been lovely and sunny since Sunday actually and I'm trying not to complain!! It is rather hot though lol, I actually keep forgetting to put on sun cream, I will have to remember tomorrow because I can feel my skin getting sunburnt and sore.

The lovely weather has forced me to put down the safety/security blanket that is my coat and walk around without it. It is a nice feeling to walk around without it. Last week (or maybe two weeks ago) it was a rainy day and I had my big coat on, then the sun came out of no where I forced myself to take it off, I didn't even have a decent top on as I just put on something that wouldn't make me too hot in my coat. I walked down the road quite self concious but put the thoughts out my head and enjoyed the sun on my skin.
This week there is no way I could wear the coat, even if I wanted to, I'd probably keel over with heat stroke before I reach the end of my road. I just grabbed my "throw over" and walked out the door, today I popped on a maxi dress with it and I have to admit it felt soooo nice in the sun, the material floating around and creating cooling air.... after a few minutes, I didn't even give a thought to what I looked like, just enjoyed the sunshine and warmth.

I am reminded how very far I have come from the person who didn't want to leave the house, the person wearing coats and jackets while suffering in the heat, the person who was so full of self dislike..... what a difference. I have far to go but it's changing little by little and I am extremely thankful.

I have decided it's time to purchase a couple of summer tops and dresses as most of my clothes are for cooler weather and definitely mostly black. Which is another thing I have realised..... my wardrobe isn't ALL black anymore!! wow!!

I think I'll post more about overcoming my "isms" as it helps me see to notice the changes and will also be helpful for me and hopefully any one who has these or other "isms" too.

Anywhoooo, my free minutes are over now and it's time to do my evening chores very soon.
*see* you soon xxx

PS, Do something you love today, even if it's something that you have a hangup about, step out, have fun, enjoy xxx


Wednesday 13 July 2016

90 Day Hair Growth Challenge - Results and Experience

Hiya!! I have finally managed to upload results video!!

I had a mishap along the way (wha'ts new?) and had to record on two different days.

Thanks again for everyone who took part and for your continual support. For those who wanted to join in when we were already started, and those who asked about doing it again, we will do another challenge in August xxx


Monday 11 July 2016

Protective Styling : Braids/Plaits

Hiya!! The sun has finally come to play here in London. It's been teasing us with guest appearences only to hide away again. On some days we've had 3 to 4 seasons worth of weather with hailstones, wind, sun and chill!
The weather has been playing games with my hair and as I may have said a few times, It was time for a protective style.
I was waiting for the 90 Day Hair Growth Challenge to end before putting my hair away and felt like some plaits or twists.

I started to notice some breakage at my crown area, where my parting is..... not just uneven hair but actual small hairs!! humph!! I do think it's because I part my hair in the same way when styling and washing. That was the final push for me to plait up my hair and I decided to crochet the plaits because that would be less time installing and removing and also the least amount of pulling on my hair while I wore them. I plaited the perimeter in single/box plaits/ braids

Plaiting/Braiding hair and Pre-Plaited/Braided packs
I have to say I love the ease of day-to-day styling that comes with plaits, no faffing about, I normally just pull the top half up into a ponytail and have half up, half down... It's soooo much quicker in the mornings for school runs.

I have had them in for around two weeks now and plan to keep them for another two at least  maybe even push to six weeks in total. I re-did the front perimeter last Saturday as they were looking quite fuzzy and yesterday I re-did the back on Thursday just gone.

It's been a while since I last had a longer term protective style, I forgot how my scalp cries for water when wash day comes and goes without me washing it.

Loving my Plaits!!

Thursday 23 June 2016

Review: Drive Car Bin

 Hiya!! Today I have a different type of review... not a hair product in sight lol.

I am reviewing a car bin of all things. Now before you give me a side eye hear me out... With so many messy lovely boys, our 7 seater car always has rubbish of some form milling around the floor, pushed between or under the seats or even just plain old left on the seats (arggghh) It drives me crazy and is especially embarrassing when we give someone a lift. (Just the other day I had to clear away some banana skins and scoop them into the space in the middle of the driver and front passenger seat)

We often use a plastic bag if there's one handy but more times than none there isn't so I have to tyr and bundle said rubbish up until we get to a bin on the roadside or home.

The youngest hates to hold any rubbish so keeps mithering me until I take it from him and I end up being a human trash can.

If we are not going far, it's not too bad or if there's just a packet to hold, but if we have a longer car trip it gets more than annoying.

So when I had the opportunity to review The Drive Car Bin I jumped at the chance and - I know it's a little sad - couldn't wait for it to arrive, Hubby was teasing me but when it arrived he was impressed and wife points were earned.


What They Say:

DRIVE Car Bin - Best Auto Trash Bag for Rubbish, FREE Waste Basket Liners - Hanging Recycle Garbage Can is Universal, Waterproof Organizer Makes a Great Drink Cooler & Road Trip Gift


We think you're going to absolutely love this new Patent Pending Car Rubbish Bin from DRIVE™Auto Products.  Why? Because we've done all the research on what buyers like or don't like about their automotive bins...

The idea of having a versatile container to help keep your vehicle clean and organized is smart.  Many who now have one are saying things like "Finally a place for all the junk in my car or boat."

...FEATURES: Patented Side Clasps to Secure Liners, a Pinning Feature, Hand Sewn Edges & Seams, Less Ripping, Stays Open, or Velcro Closed, Handy Storage Holder for Kids Toys, Color Matches Tan Grey Black Leather or Cloth, All Performance Parts Accessories for Cars, Truck, Boats, SUV, Van, or RV!

...BONUS: 20 Pack Trash Liners - We heard the user comments, "to keep it clean & odor free we buy disposable bags for inside".  So we included 'em!
 

What I Think:

The Drive Car Bin is a great size and fits nicely in the middle of the two front seats as well as in the back.The plastic bags (20 are given free) are the perfect fit and if needs be a standard grocery bag will fit.
Hanging strap over head rest.
I love the strap as I can place the bag over the seat head and hang it so that the boys can fill it when they need to, they actually enjoy putting their rubbish away. No more "here mum".
The Bin is quite stylish and well designed. The clips/hooks on either side keep the bag in place and the Velcro fastening at the top is a fab touch. The mesh compartments at the side are nifty for additional storage.

One man's trash..... ;)


The Bin is waterproof and keeps spillages contained - yes this was put to the test lol. And can be wiped clean easily.


Used as cooler/organiser prior to a bin.


As the information states it can be used as a cooler and organiser I tried it out and it kept my iced tea cold and held some snacks for the boys, wipes and other items I like to take on a car journey.
After the snacks were finished, I put the plastic bag in the bin and filled it with the empty wrappers and stray rubbish.

I'm very pleased I saw this as to be honest I didn't even know something like it existed. I was going to try a hack I discovered of using a plastic cereal container but this is far better.

Hubby and the boys like it as much (if not more) as I do and the car is much tidier.

The description mentions that the Drive Bin would make a "great road trip gift" I can see that, I also think it would make a good base for a  "Hamper Gift" I like to make up for birthdays and Christmas. It's often hard to make them for men but I can see this working well as a car hamper filled with car bits like anti freeze, window squeegee, car freshener, driving gloves etc or as they suggest a road trip themed one filled with drinks, snacks, cd (or maybe a mp3 player or satnav if used as main present) fan, phone holder etc.

The  Drive Bin is £18.99 but is on sale £10.67and can be found Here on Amazon UK


**Please Note**
Although I received this product free to review, my opinion, as always is genuine and unbiased

#drivebin

Saturday 4 June 2016

Hello There......

....... Oh dear!! I have more than dropped off!! I cannot even start to formulate a bunch of excuses. It has been a very hectic month or so, I've been going through a few issues and haven't had the time or if I'm truthful the inclination to blog.
I did want to.... my mind was full of posts that I wanted to type but that's as far as it got.
I am going to start my lists again and get back doing what I love.
I'll be back in a couple of days..... better than before.... hopefully.... lol no definitely.

"see you soon" xxx

Friday 22 April 2016

90 Day Hair Growth Challenge - Update and Length Check.


Hiya!! Here's an Update for the 90 Day Hair Growth Challenge and a Length Check.


Wash Day Recap - Part 1

I realise I haven't published a wash day post for ages!! I have obviously been washing my hair lol. I just haven't been documenting them. I have been posting on Instagram as it is somewhat easier and quicker but as it's easier to look back on what works wash day wise on the blog I thought it was a good idea to post a few "lost" wash days to keep an eye on what I have been doing/using.


Jan 18th (Two Cane/Cornrows/Cameroes):


Jan 18 wash day

I was trying to combat the scalp issues I was having (see This post for further info) and wanted to keep my regime(n)/routine as simple as possible and also use products to target the problem and/or as natural as it could be.
Cleanse -  Sheamoisture African Black Soap shampoo.
Tea Rinse - Nettle, Fennel and Peppermint tea mix.
Deep Conditioner - Coconut Milk Powder, Avocado Oil, Manuka Honey and Sheamoisture African Black Soap Purification Masque.
Leave Ins - Eden Bodyworks Peppermint Tea Tree oil and Jojoba Monoi Hair Milk, Sheamoisture African Black Soap Elixir, Avocado and Pumkinseed oil mix.

The deep conditioning mix felt great and applied to my hair like a dream. I used a shower cap, hottie and scarf to generate heat while I cooked. (I actually forgot about that!! I will deffo use the hottie next week) It was getting late so I'm went under the dryer for a little while then plait my hair in two cane/corn/cameroes.


Feb 16th (Wash and Go):

Feb 16 wash day


I was sooo excited to use the Aubrey, Anita Grant and Jane Carter products I was given.

Overnight Pre-poo - Jane Carter Restore Moisture Mist, Aubrey Honeysuckle Rose Conditioner, and Anita Grant Organic Sapote Castor Oil. (I applied them as if I was moisturising and sealing).
Tea rinse - Hibiscus Petals, Essential Oils (Lemongrass and Peppermint) infused in boiling water.
Deep Conditioner - Manuka Honey, Coconut milk powder, pumpkin seed and mustard seed oils mixed into a paste and added some Aubrey Island Natural Avocado Oil and Mango.
Leave Ins - Sheamoisture African Black Soap Dry Scalp Elixr and Coconut&Hibiscus Curl and Style Milk, Anita Grant Sapote Castor Hair Oil, Avocado oil (for scalp and mixed with the castor oil for sealing). Eco styler gel (argan) and Curls Pasion Fruit Curl Control Paste (I wanted to "weigh down" my hair).

The tea rinse smelt really nice as did the conditioning mix!! Both really agreed with my hair and it was soooo soft. The conditioning mix had great slip.


 18th March Quick Wash and Go:

March 18 wash day


The video for this wash day can be found in This post. I thought it would be beneficial to add them in "written form" for a reminder.

Cleanse - Pantene for naturals Cowash 
Deep Conditioner - Capilo La Aplanadora Treatment and Cantu Deep Treatment Masque
Leave Ins - Nexxus Encapsulate Caviar Serum, Shea Moisture Coconut and Hibiscus Curl and Style Milk, Eden Bodyworks Hair Milk (Jojoba Monoi) Kokolicious Hairlicious Hair Growth Oil, Aunt Jackies Don't Shrink Flaxseed Gel.

I loved the way this wash and go turned out!


March 24th Clarifying Wash:


Pre-poo - (overnight) Aunt Jackies In Control Conditioner.
Cleanse - My hair needed a good clarify so I grabbed my Ors Creamy Aloe Shampoo. I noticed my bottle is almost finished!! I have about two more washes left in this one. 
Deep Conditioner - After the shampoo, I needed a moisture boost so grabbed both my Kanechom Karite Butter Hair Mask and Capilo La Aplanadora Hair Treatment. (Trying to use up my conditioner stash.)
 
Nb, For some reason my hair was quite tangly when It was time to rinse conditioner out. So I had the detangle with my wide tooth rake comb.


Since this post is getting so long and I keep stopping and starting *blush*
I'll split it into two. I have really enjoyed looking back and having a look at the products I used, hopefully this is interesting for you too.


Monday 11 April 2016

3rd Empties!

Hiya!! I have finally recorded an empties video!! The bag is crying at me and I soooo need to free up the space.
To keep the video length shorter I decided to show the deep conditioners that I used up first. I have a serious empties backlog and these are actually from 2014-2015 ugh!!
It was good for me to have a look at the conditioners I used in the middle of my transition.


Wednesday 6 April 2016

(catch up) Easter/ Spring Decor

Hmmm I seem to be catching up a lot lately!! School holidays will be over soon and I'll have more time. I've also stopped one of my commitments so that will also free up some time but knowing me, that time will soon be filled with something else *grin*.

I thought I'd share a few pictures of the decor pieces from the haul video (this post)in their new homes.


Dining Table. (please excuse rumpled table cloth)

I love the cute chick!! The eggs keep fooling people, they think they're chocolate eggs.
 

Glitter eggs.
Window Sill 1 - I actually put the chicks on top of the cages but someone keeps putting them inside!


I loved how the simple glitter eggs turned out. I saw the flowers in bottles on reduction and snapped them up.


Window Sill 2


Vanity


The string eggs from this post came out well. There a few fails where the balloon deflated.
The bunny is sooooo cute. I love the jar also. I put some feathers at the bottom and some of the pink eggs on top. I placed one of the smaller string eggs that had pink eggs inside. I don't think I'm going to want to empty/change it after all the Easter stuff gets put away.


I really enjoyed putting these bits together. I'd love to see what you have done.


Sunday 3 April 2016

(catch up) Demo - Quick Wash and Go


Hiya! Still Catching up!! I forgot to post the video I uploaded showing my requested Demo of my quick Wash and Go.
I hope you enjoy. Please let me know any tips or fave products you have for Wash and Go's


Saturday 2 April 2016

(catch up) Easter and Springtime Haul - Poundland and Hobbycraft.

Hiya!! We're in the middle of the Easter school holidays and I'm trying to catch up lol

Here's the Easter and Springtime Haul video I uploaded last week.
I raided Poundland and Hobbycraft for some bits and pieces to decorate with and to make gift bags for the boys, my mummy and her hubby and our little friends.

I was still feeling a little ill so please excuse my voice, low energy and shaky camera *covers eyes* I hope you enjoy xxx


Tuesday 29 March 2016

Easter Crafting - Gifts

I made up a few Easter gift bags for some of our little friends. I didn't take pictures of all unfortunately as I ended up packing and making late into the night (or early into the morning, gahhh) and completely forgot.

I did however take pics of the cute felt flower hair band I made for Princess S.


I put it into the sweet little chick egg. I will definitely be making some more felt hair bands I forgot how fun they are to make and how cute they turn out.

I also put some goody bags together for the boys and a bucket for the youngest:


I didn't want to buy big eggs as we limit the amount of sweeties and sugary goods the boys eat but I found little kinder treats in Poundland that I thought would be a treat.

I really enjoyed putting the bags together for all the kiddies. 


Wednesday 23 March 2016

Easter Crafting - Treats

Can you believe I crafted?! I can't, it's been so long. 
The first Easter craft was some class treats.
The boys like me to make little class gifts when the various holidays come around and as this is Kuppies first nursery holiday I wanted to make him some for his class. The middle two will no doubt be slightly jealous but I didn't have the time to make 73 treats this time round!!
I wanted to give the little ones something to eat but not candy so I went for little boxes of raisins.
I went for really simple decoration as the kiddies are very young.

- card from Poundland, stickers from Hobbycraft and raisins from Aldi. (I also used my scallop punch from Stampinup)


Very simply but so cute. I put them in a paper bag and stuck a big puffy egg sticker on the front. Kuppie saw the bag as soon as he came to greet me after nursery (I was sick in bed) he was so happy when I showed him what was in the bag. He can't wait to take them in tomorrow.

The second Easter craft was some yarn eggs.
I have been watching a few (ok many lol) videos with Easter decor tours, hauls diys  and crafts and I kept seeing string/yarn eggs. I remembered that last year I saw the eggs after Easter and wished I saw it sooner so I could try it out, well this Easter is here and I decided to give it a go.
I wanted to use the eggs in the boys' treat bags and also as part of our home decor.
I wanted to fill the eggs as I really like the look and I know the boys will love the effect. I tried to fit the toys I am adding to the bags but they were too big so I ended up putting the rocket balloons in. For the decor eggs I put three mini polystyrene eggs inside.

- Yarn, birthday balloons, rocket balloons and pva glue from Poundland, mini polystyrene eggs from Hobbycraft.


The eggs are drying out overnight. I made a makeshift drying box with a washing line and pegs to catch to glue as I didn't have anywhere to hang them up where the glue wouldn't make a mess and I also want to hide them from the boys.

When they're dry I will pop the balloons.

Tomorrow I will pack the boys' treat bags and craft some more decor items.

I hope you enjoyed this post, I really want to get back into crafting. I used to craft all the time and enjoyed being part of design teams and taking part in challenges, swaps and virtual crops.

I'd love to see the decor pieces you've made or bought for Easter.


Thursday 17 March 2016

Transition Over!!! Now Officially natural.

Whhhhooooopppppp!!!! As you can see from the title I am officially natural Whooop Whooopp.

Trimmed Hair {I trimmed in twists}


Oh wow!! My transition from relaxed hair is over. I started transitioning around December 2013 when I decided that I wanted to "go natural". I was trying to get my hair healthy and stretched my relaxer, thinking it was best to give my hair a break from the chemicals while it recovered and grew back. The stretch got longer and as my new-growth/regrowth grew I didn't want to relax and then I just realised I didn't want to use the chemicals on my hair at all. My scalp is so sensitive that I would get burns and I couldn't actually keep the relaxer on for processing, it was literally applying the relaxer, combing through and rinsing it off... sometimes I couldn't even get to comb it through too well as the burning was so bad.
It didn't matter if I used a 'gentle' relaxer or a 'children's' one. It was the same.

I was tired of it, the pain, the mess, the smell.... Even when relaxed, my hair would choose to do it's own thing when it wanted, how it wanted. I would style it and it would frizz or curl or wave.... I would have to straighten/flat iron it or tong it for it to act how I wanted but that wouldn't even last for more than a few hours so it really wasn't worth going through all the hastle of relaxing.

I made the decision not to use relaxers any more and chose to transition rather than big chop. I wasn't brave enough to cut all my hair off, so transitioning was the way to go. To be honest, I didn't even know what I was doing or have any plan.... I didn't actually know what I was doing had a name lol, I just wasn't relaxing my hair any more. Looking back, things really would have gone better if I had a plan or knew where to look for information when I started out. Along the way I found the info I needed and a lot was trial and error.

During my transition, my hair went through many stages, some easy but some very frustrating and down right annoying lol.

I used protective styles and low manipulation styles to help me along the way and learned to "listen to my hair" it sounds all airy fairy but truly... I have come to realise that if I want things to go well with my hair then I have to follow my hair - if it's dry? add moisture, too soft or 'acting' up? add protein, not styling a certain way? just style it differently lol, and that's just a few examples.

I trimmed my hair when I felt ready to at each stage and only trimmed as much as I was comfortable with. Sometimes it would be a very small trim and other times I would get brave and cut longer bits. This last trim I had quite a bit of split and frizzy ends so I knew I would be trimming quite a bit off and knew it would make sense to just trim off all the relaxed ends that were left at the same time. I twisted my hair and trimmed it that way, you can see THIS post (opens in new window) to see the style and trim video.


From the above picture, you can see the trimmings that still had relaxed ends (circled in pink). The bit at the top was quite long!!

It's a great feeling to be done with the transitioning and now I have started a new chapter in my Healthy Hair Journey - Growing my Natural Hair.
I know that seems odd to say considering I've been growing my hair all along, but for every inch of growth I achieved, it had to be trimmed off to get rid of the relaxed ends. So now the growth I get is all mine *queue cartoon villain laugh*


I just want to encourage you fellow transitioners, it does get easier and you will get there xxx

Tuesday 15 March 2016

Product Junkie Rehab {Used item} - Giovani Direct Leave-In Conditioner.


I used up another item from my current "Use Up List". You can see THIS post for more info
(opens in new window).


I realise it's hard to see the item amongst the rest as the bottle is very modestly designed.


The item is Direct Leave-In Weightless Conditioner by Giovani.
I have to confess (It's good for the soul after all ;>  ) I finished the item and bought another one because my scalp was giving me issues and I wanted a very natural item that would be not only effective but also wouldn't aggravate my scalp.


Definition from official site;

  • Pump up your style: this leave-in treatment repairs to help plump up each strand for undeniable thickness that lasts
  • Restores strength, luster and nourishment to abused hair
  • Moisturizes and builds body
  • Detangles for easy comb-out, easy styling

Ingredients and Information from Shopping Sites (amazon uk and House of Nutrition);
Aqua (Purified Water), **Aloe Barbadensis (Aloe Vera) Leaf Juice, *Rosmarinus Officinalis (Rosemary) Leaf Extract, *Urtica Dioica (Nettle) Extract, *Thymus Vulgaris (Thyme) Extract, *Chamomilla Recutita (Matricaria) Extract, *Salvia Sclarea (Clary) Leaf Extract, *Lavendula Angustifolia (Lavender) Extract, *Tussilago Farfara (Coltsfoot) Flower Extract, *Achillea Millefolium (Yarrow) Extract, *Equisetum Arvense Extract, *Glycine Soja (Soybean) Seed Extract, Cetyl Alcohol (plant derived), Tocopherol (Vitamin E), Panthenol (Pro-Vitamin B5), Citric Acid (corn), Phenoxyethanol, Grapefruit Seed (citrus derived), Fragrance (Includes Essential Oil). *Certified Organic by Guaranteed Organic Certification Agency. **Certified Organic by Quality Assurance International


Directions: Apply to freshly shampooed, towel-dried, damp hair and comb through to distribute evenly. Do not rinse. Air dry or blow dry for body
  • A weightless, stay-in hair conditioner
  • Imparts shine, body & compatibility
  • Excellent for swimmers & sunbathers
  • Prevents and repairs split ends
  • Not tested on animals


My Experience/Review;
This is an item that I have purchased many times. I love that the ingredients are natural and many are organic. There's no parabens, sulphates or dyes added which is great.

Texture:
This leave in has a light lotion like consistency that melts quickly when poured and rubbed in the hand. Although it is light it is feels quite creamy. My hair has a good amount of slip when this is applied to it.


Fragrance:
Fresh and fruity. The fragrance is very subtle and reminds me of natural/organic baby products. It doesn't linger on the hair.

Value for Money:
Approx £7.99 for 250ml/8.5fl oz - I think the price is quite good considering the ingredients are full of organic items.


Pros:
Full of natural and many organic ingredients.
No parabens.
Pleasant fragrance
Fulfils purpose/claims - detangles, moisturises.
Light so doesn't weigh down.
No buildup.
Very gentle on scalp.


Cons:
Hair didn't feel as moisturised the next day when used as a Leave-In after washing.
Not always thick enough.
Not easily accessible - found in specialised shops.
Bottle doesn't last as long as heavier products.


Would I repurchase?
I would and have repurchased again (as I confessed lol) I would and have recommended this product to others.

Giovani Direct Leave-In Weightless Conditioner  can be found in Whole Foods, My Hair and Beauty ,Holland and Barret and other health food/ organic shops.